Recipes
Named looks — riso, vhs, crt, gameboy — composed from the built-in effects.
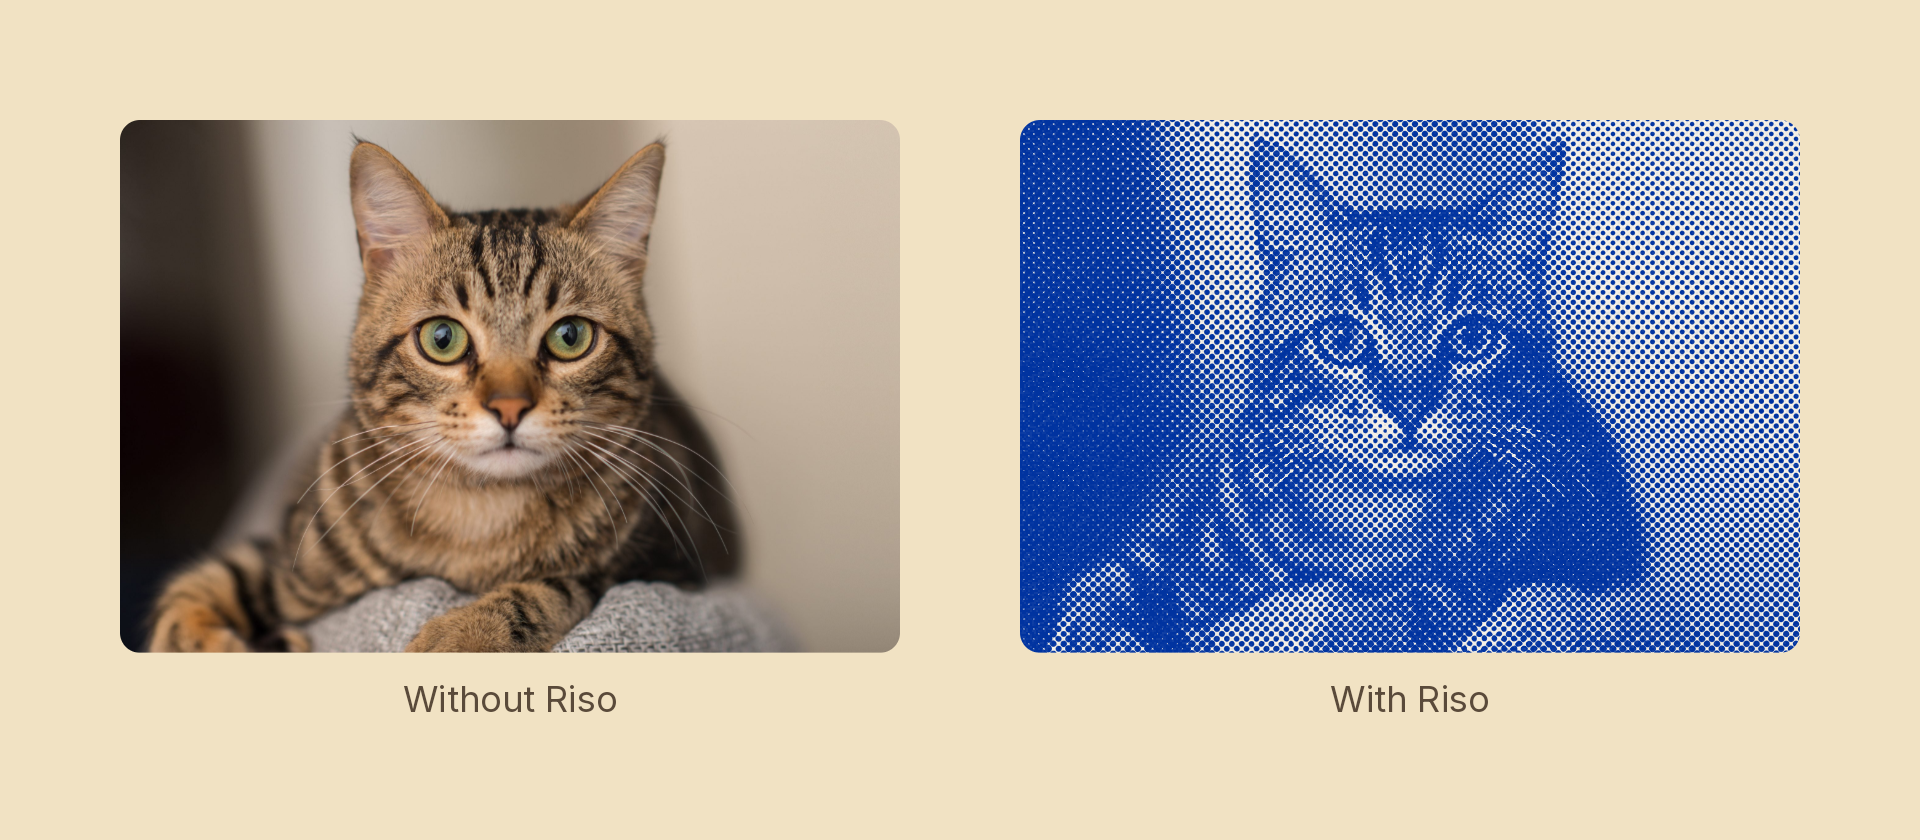
These are not part of the library. A recipe is a matter of taste, and taste should be yours to retune without waiting on a release: copy the ones you want into your own project and change the numbers freely. Shipping them as API would freeze every value below into a compatibility promise, which is the opposite of what a look wants.
Nothing here is special. A recipe is a function returning a plain EffectChain, so it stays transparent (log one and you see exactly which effects it used), extensible, and free of any separate render path:
<Image src={'./photo.jpg'} effects={vhs()} />        // full strength
<Image src={'./photo.jpg'} effects={vhs(0.6)} />     // dialled back
<Image src={'./photo.jpg'} effects={riso().blur(2)} />         // keep building
<Image src={'./photo.jpg'} effects={[crt(0.6), FX.grain(0.1)]} /> // or mix
Both helpers every recipe uses:
import { Effects, EffectChain, Color } from 'motion-script';

/** Interpolate from a recipe's neutral setting toward its full-strength one. */
const at = (amount: number, neutral: number, full: number): number =>
  neutral + (full - neutral) * amount;

/** Clamp an authored amount into the 0–1 the contract promises. */
const clamp = (amount: number): number => Math.max(0, Math.min(1, amount));
The recipes
| Recipe | Composed from | Knobs |
|---|---|---|
riso | halftone → grain → duotone | ink, paper |
newsprint | halftone → grain → duotone | size |
blueprint | edges → grain → duotone | color |
photocopy | posterize → grain → grayscale → duotone | – |
vhs | blockDisplace → rgbShift → scanlines → grain → vintage | seed |
crt | bulge → scanlines → vignette → bloom | spacing |
glitch | blockDisplace → rgbShift → bitCrush → scanlines | seed |
gameboy | dither → bitCrush → pixelate | blocks |
screenPrint | posterize → colorAdjustment | levels |
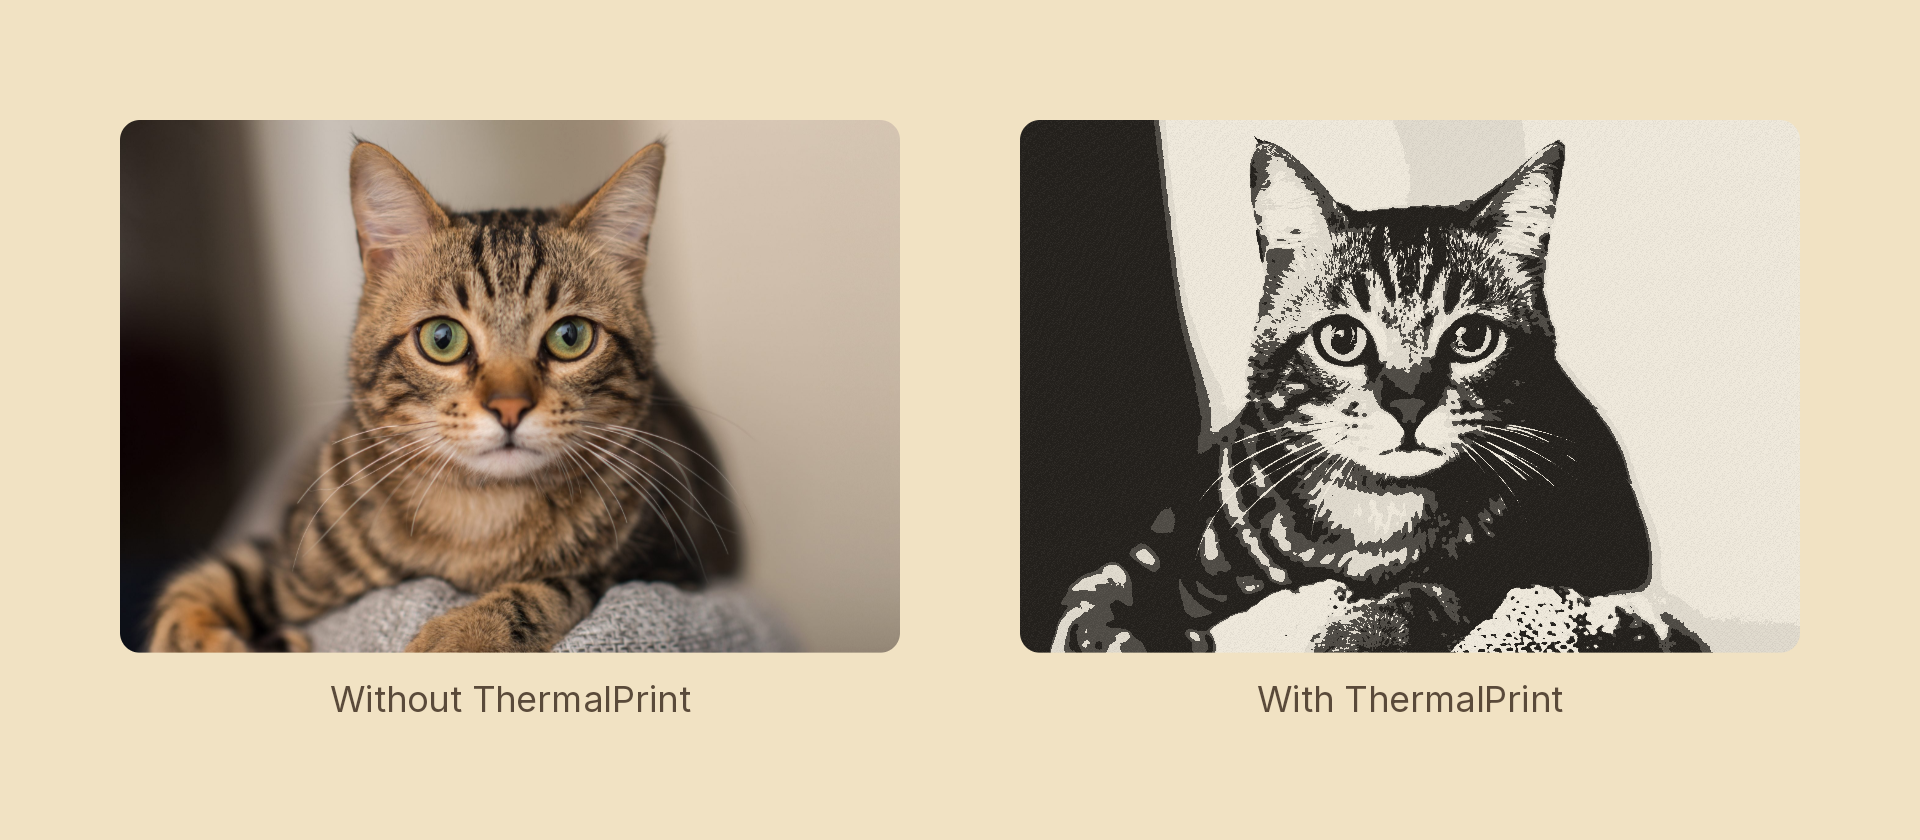
thermalPrint | posterize → grain → grayscale → duotone | – |
pencilSketch | edges → grain → duotone | graphite, paper |
chalk | edges → grain → duotone | board |
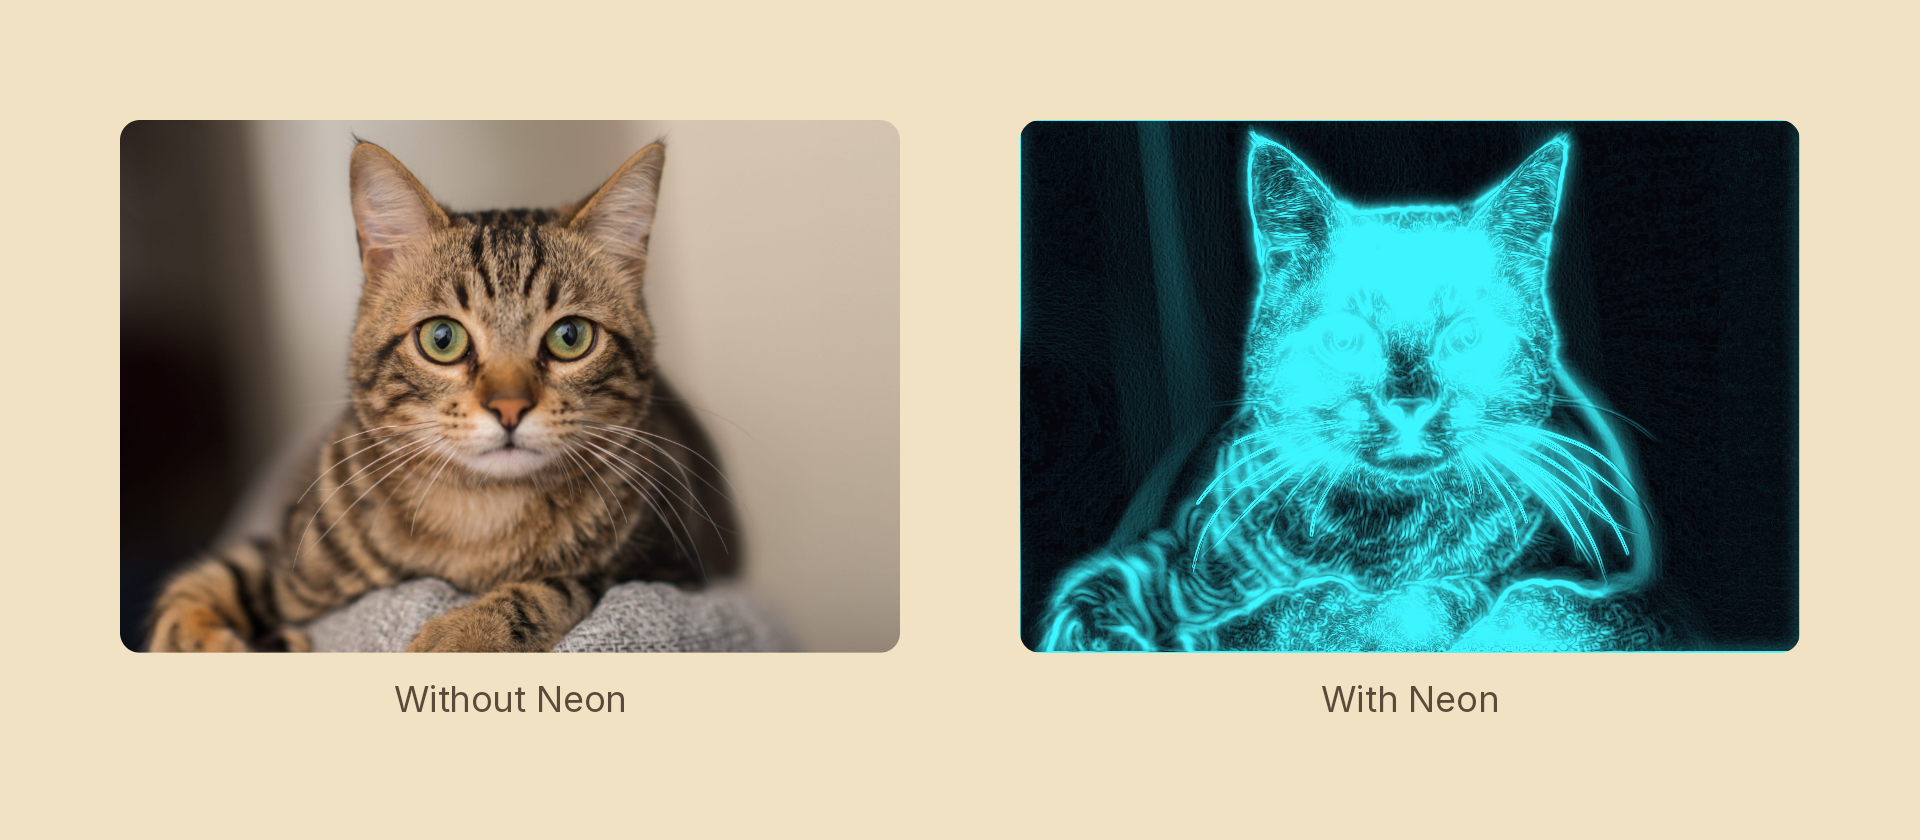
neon | edges → bloom → duotone | color |
comic | halftone (cmyk) → colorAdjustment | size |
anamorphicGlare | streak → bloom | angle |
oilPainting | oilPaint → colorAdjustment | radius |
paper | texture → grain → colorAdjustment | src (required), scale |
/**
 * Risograph — a spot-ink duplicator print. Screen *before* inking: the halftone
 * reduces the image to dots, and the duotone maps those dots to ink and paper.
 * Inking first would leave the screen chewing through an already-coloured image.
 */
export const riso = (amount = 1, ink: Color = '#0033a0', paper: Color = '#f6f1e7'): EffectChain => {
  const a = clamp(amount);
  return Effects
    .halftone({ size: at(a, 0.5, 7), angle: 45 })
    .grain({ amount: at(a, 0, 0.14), size: 2 })
    .duotone({ amount: a, shadows: ink, highlights: paper });
};

/** Newsprint — a fine neutral screen on grey stock. */
export const newsprint = (amount = 1, size = 4): EffectChain => {
  const a = clamp(amount);
  return Effects
    .halftone({ size: at(a, 0.5, size), angle: 45 })
    .grain({ amount: at(a, 0, 0.1), size: 1 })
    .duotone({ amount: a, shadows: '#1a1a1a', highlights: '#e8e2d4' });
};

/**
 * Photocopy — tone blown to near-black-and-white, with toner speckle. Uses
 * `grayscale` + `posterize` rather than the more obvious `threshold`, because
 * threshold has no neutral setting to ramp from (see the contract below).
 */
export const photocopy = (amount = 1): EffectChain => {
  const a = clamp(amount);
  return Effects
    .posterize({ levels: at(a, 255, 3) })
    .grain({ amount: at(a, 0, 0.2), size: 1 })
    .grayscale(a)
    .duotone({ amount: a, shadows: '#141414', highlights: '#f2efe6' });
};

/** Thermal receipt — near-two-tone charcoal burned onto warm stock. */
export const thermalPrint = (amount = 1): EffectChain => {
  const a = clamp(amount);
  return Effects
    .posterize({ levels: at(a, 255, 2) })
    .grain({ amount: at(a, 0, 0.12), size: 1 })
    .grayscale(a)
    .duotone({ amount: a, shadows: '#23201c', highlights: '#efe9dc' });
};

/**
 * Screen print — flat spot colours with hard edges. Alone of the print looks
 * this keeps the source's *colour*: a screen print is several saturated inks,
 * not one. The saturation push is what stops the flattened bands reading as
 * merely low-quality.
 */
export const screenPrint = (amount = 1, levels = 3): EffectChain => {
  const a = clamp(amount);
  return Effects
    .posterize({ levels: at(a, 255, levels) })
    .colorAdjustment({ contrast: at(a, 1, 1.5), saturation: at(a, 1, 1.45) });
};

/**
 * Comic — flat colour behind a process dot screen. Rides `halftone`'s `'cmyk'`
 * separation, and would not work without it: an RGB screen has no K plate, so
 * every neutral prints three overlapping colour dots and the page turns to
 * confetti. With darkness on its own plate, paper stays paper.
 */
export const comic = (amount = 1, size = 7): EffectChain => {
  const a = clamp(amount);
  return Effects
    .halftone({ size: at(a, 0.5, size), angle: 15, separation: 'cmyk' })
    .colorAdjustment({ saturation: at(a, 1, 1.35), contrast: at(a, 1, 1.15) });
};

/**
 * Paper stock — your texture multiplied over the content. The one recipe that
 * needs an asset: `src` points at an image in your `public/` folder. That also
 * makes it the template for a whole material family — swap the image for a
 * weave, a denim scan or a felt photograph and it becomes canvas, denim or felt.
 */
export const paper = (src: string, amount = 1, scale = 1): EffectChain => {
  const a = clamp(amount);
  return Effects
    .texture({ src, amount: at(a, 0, 0.75), blend: 'multiply', scale })
    .grain({ amount: at(a, 0, 0.08), size: 1 })
    .colorAdjustment({ temperature: at(a, 0, 0.12), contrast: at(a, 1, 1.05) });
};
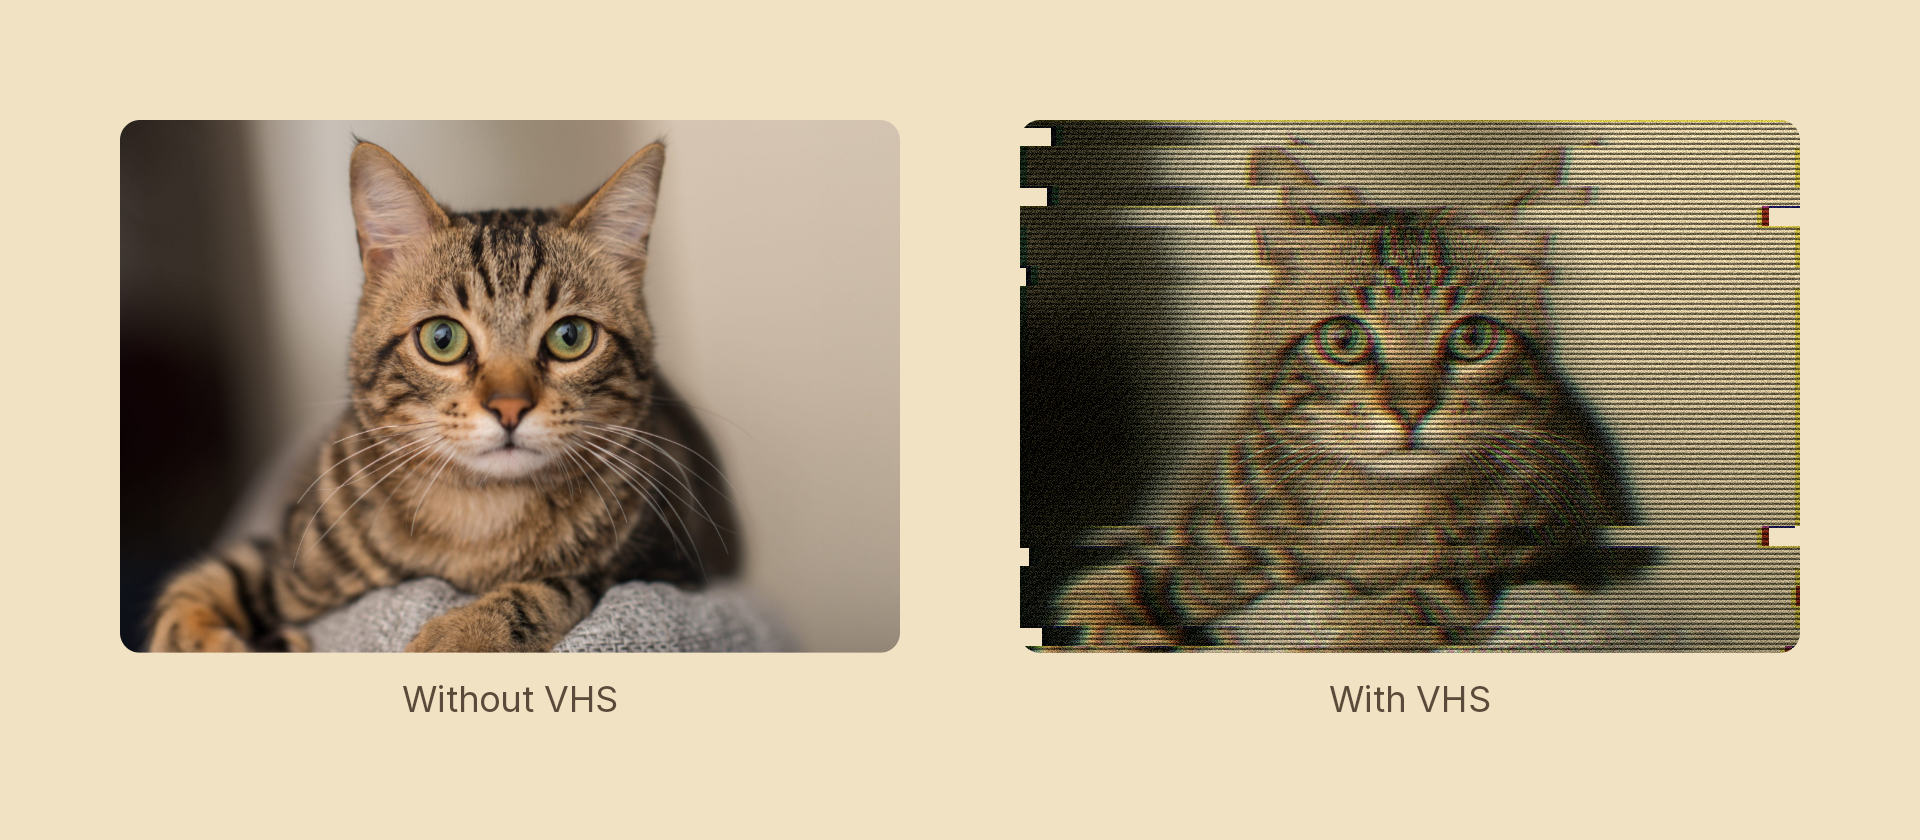
Screen
/**
 * VHS — tape damage read back through a warm, soft tube. Damage, separate, then
 * the display's own artefacts. The `vintage` grade reads as the tape's colour
 * response and would sit first in a signal chain, but it is a filter and so
 * always lands last — written here where it runs.
 */
export const vhs = (amount = 1, seed = 7): EffectChain => {
  const a = clamp(amount);
  return Effects
    .blockDisplace({ amount: at(a, 0, 40), size: 20, density: 0.4, seed })
    .rgbShift({ red: { x: at(a, 0, 7), y: 0 }, blue: { x: at(a, 0, -5), y: at(a, 0, 2) } })
    .scanlines({ darkness: at(a, 0, 0.55), spacing: 5 })
    .grain({ amount: at(a, 0, 0.22), animated: true })
    .vintage({ amount: at(a, 0, 0.5), warmth: at(a, 0, -0.2) });
};

/**
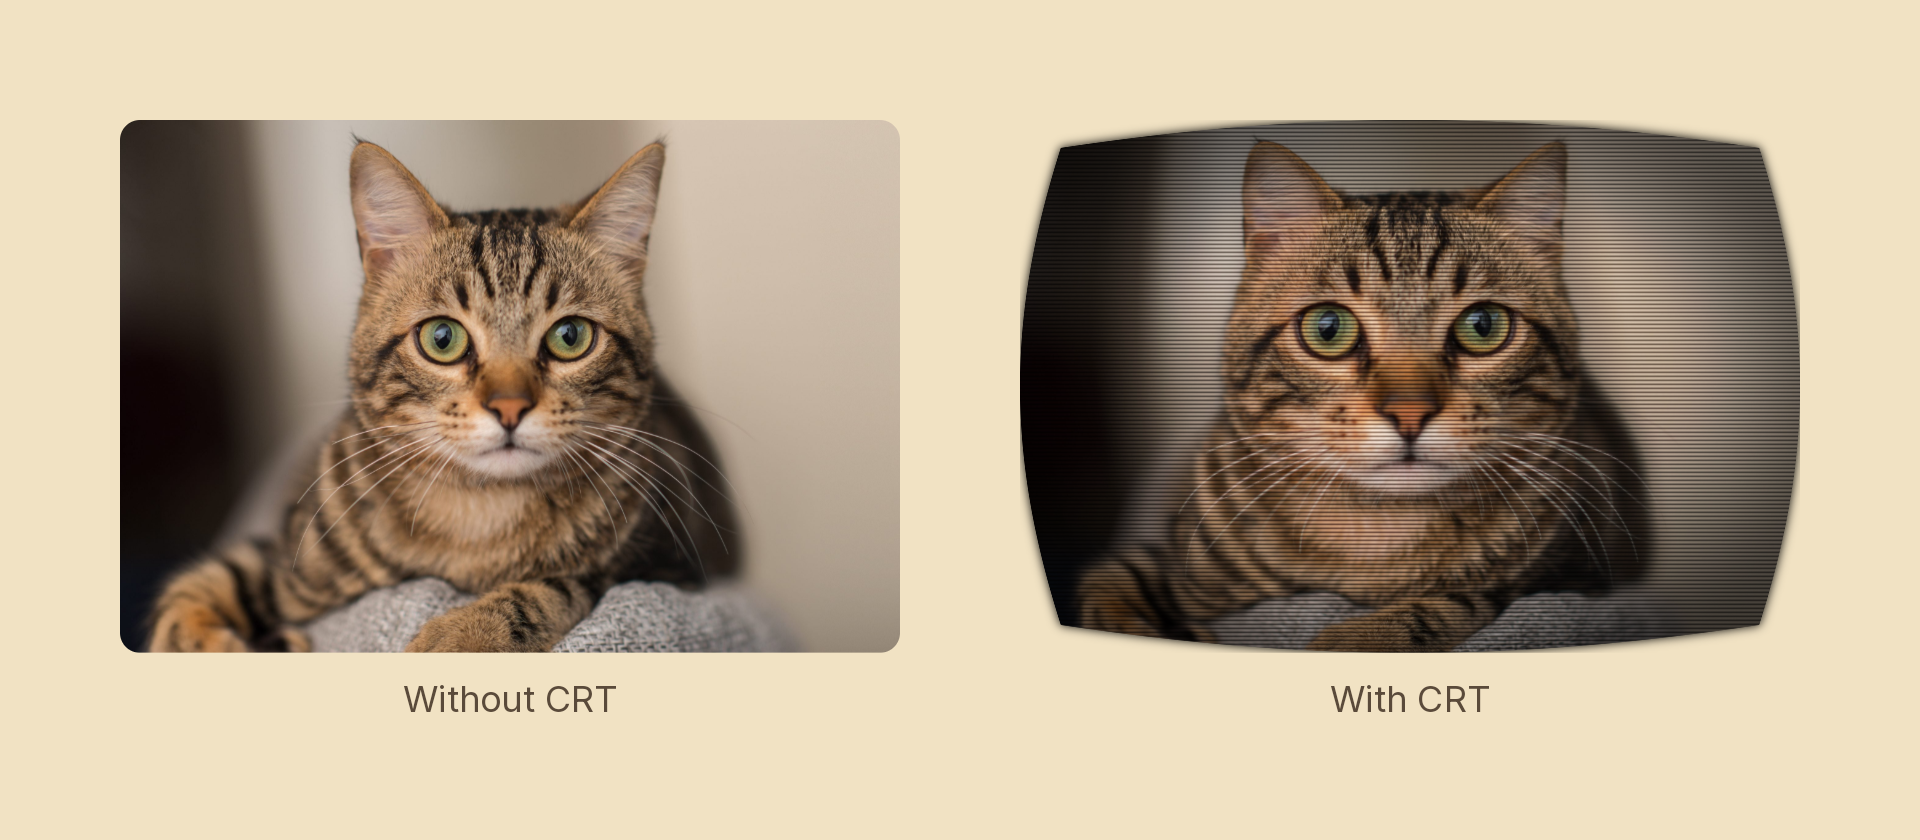
 * CRT — a curved tube with visible line structure and bloom. The bulge goes
 * first so it warps the *content*; the scanlines are then drawn straight over
 * it, which is where they physically live — on the glass, not in the signal.
 */
export const crt = (amount = 1, spacing = 4): EffectChain => {
  const a = clamp(amount);
  return Effects
    .bulge(at(a, 0, 0.12))
    .scanlines({ darkness: at(a, 0, 0.5), spacing, thickness: 0.45 })
    .vignette({ amount: at(a, 0, 0.55), radius: 0.6, softness: 0.6 })
    .bloom({ intensity: at(a, 0, 0.9), threshold: 0.6, radius: 10 });
};

/** Glitch — harsh digital breakup, ungraded. */
export const glitch = (amount = 1, seed = 3): EffectChain => {
  const a = clamp(amount);
  return Effects
    .blockDisplace({ amount: at(a, 0, 70), size: 12, density: 0.55, seed })
    .rgbShift({ red: { x: at(a, 0, 12), y: 0 }, blue: { x: at(a, 0, -12), y: 0 } })
    .bitCrush({ bits: 4, amount: at(a, 0, 0.8) })
    .scanlines({ darkness: at(a, 0, 0.25), spacing: 3 });
};

/**
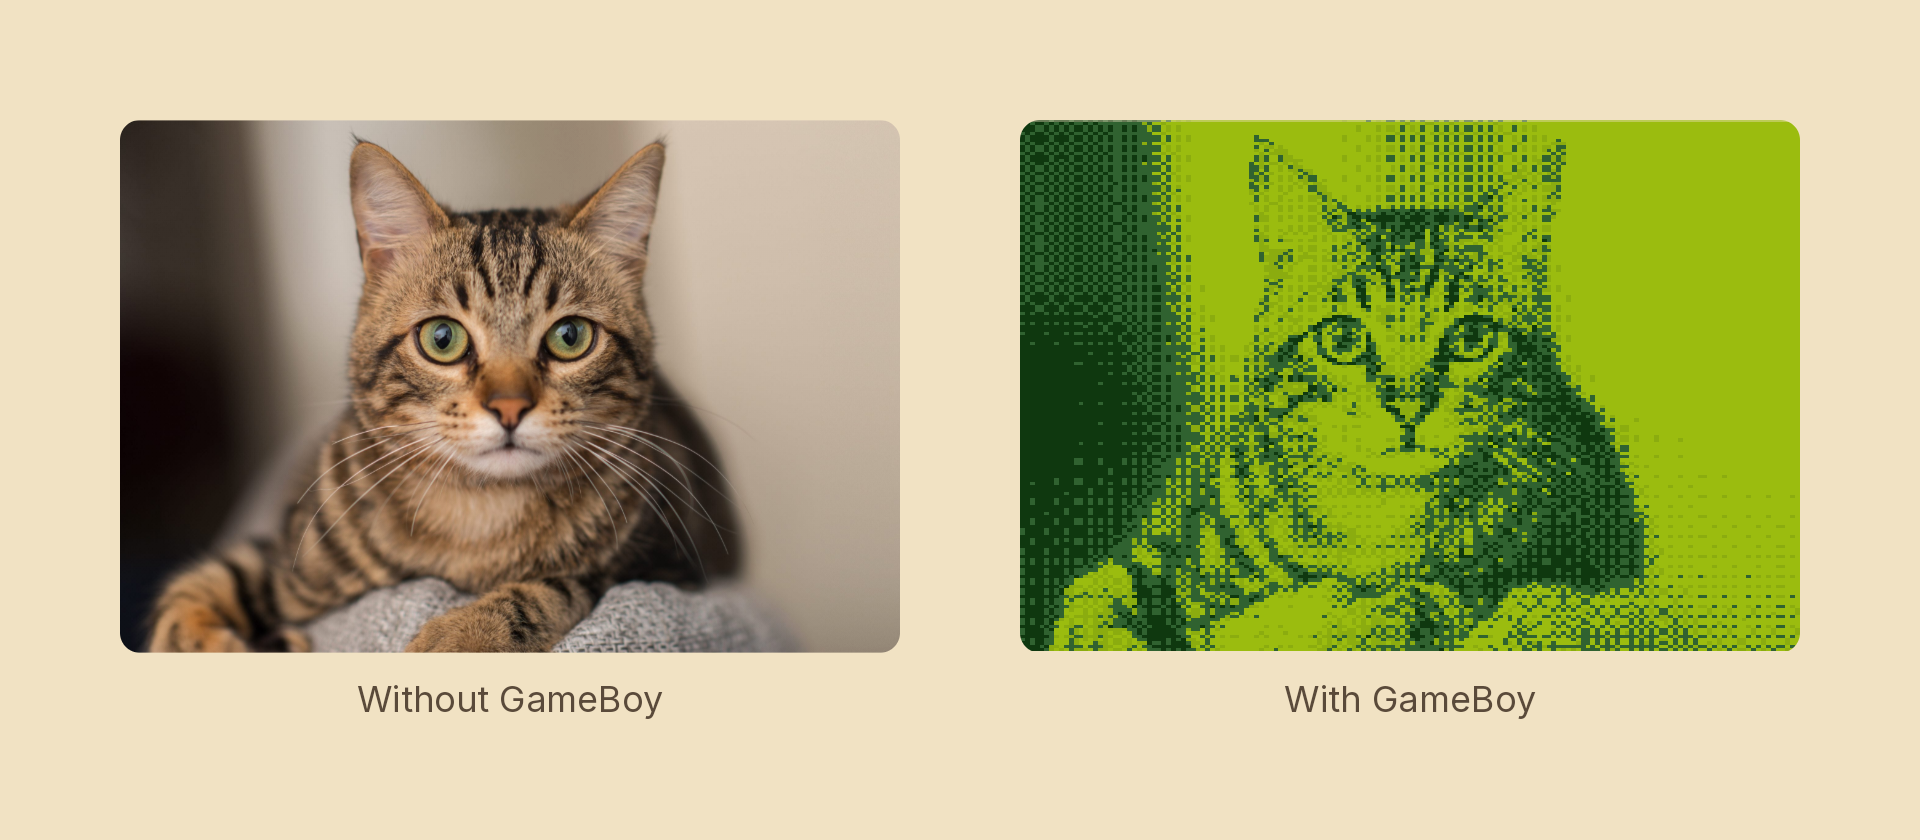
 * Game Boy — the DMG panel: low resolution, ordered dither, four greens.
 * `pixelate` is a filter, so it runs *after* the two shader passes whatever the
 * chain says — the chunky blocks are formed last, from an already-quantized
 * image, and each block takes one palette colour because `sharpColors` samples
 * rather than averages.
 */
export const gameboy = (amount = 1, blocks = 160): EffectChain => {
  const a = clamp(amount);
  return Effects
    .dither({ levels: at(a, 255, 4), matrix: 4 })
    .bitCrush({ palette: 'gameboy', amount: a })
    .pixelate({ blocks: at(a, 1920, blocks), sharpColors: true });
};
Drawn
/**
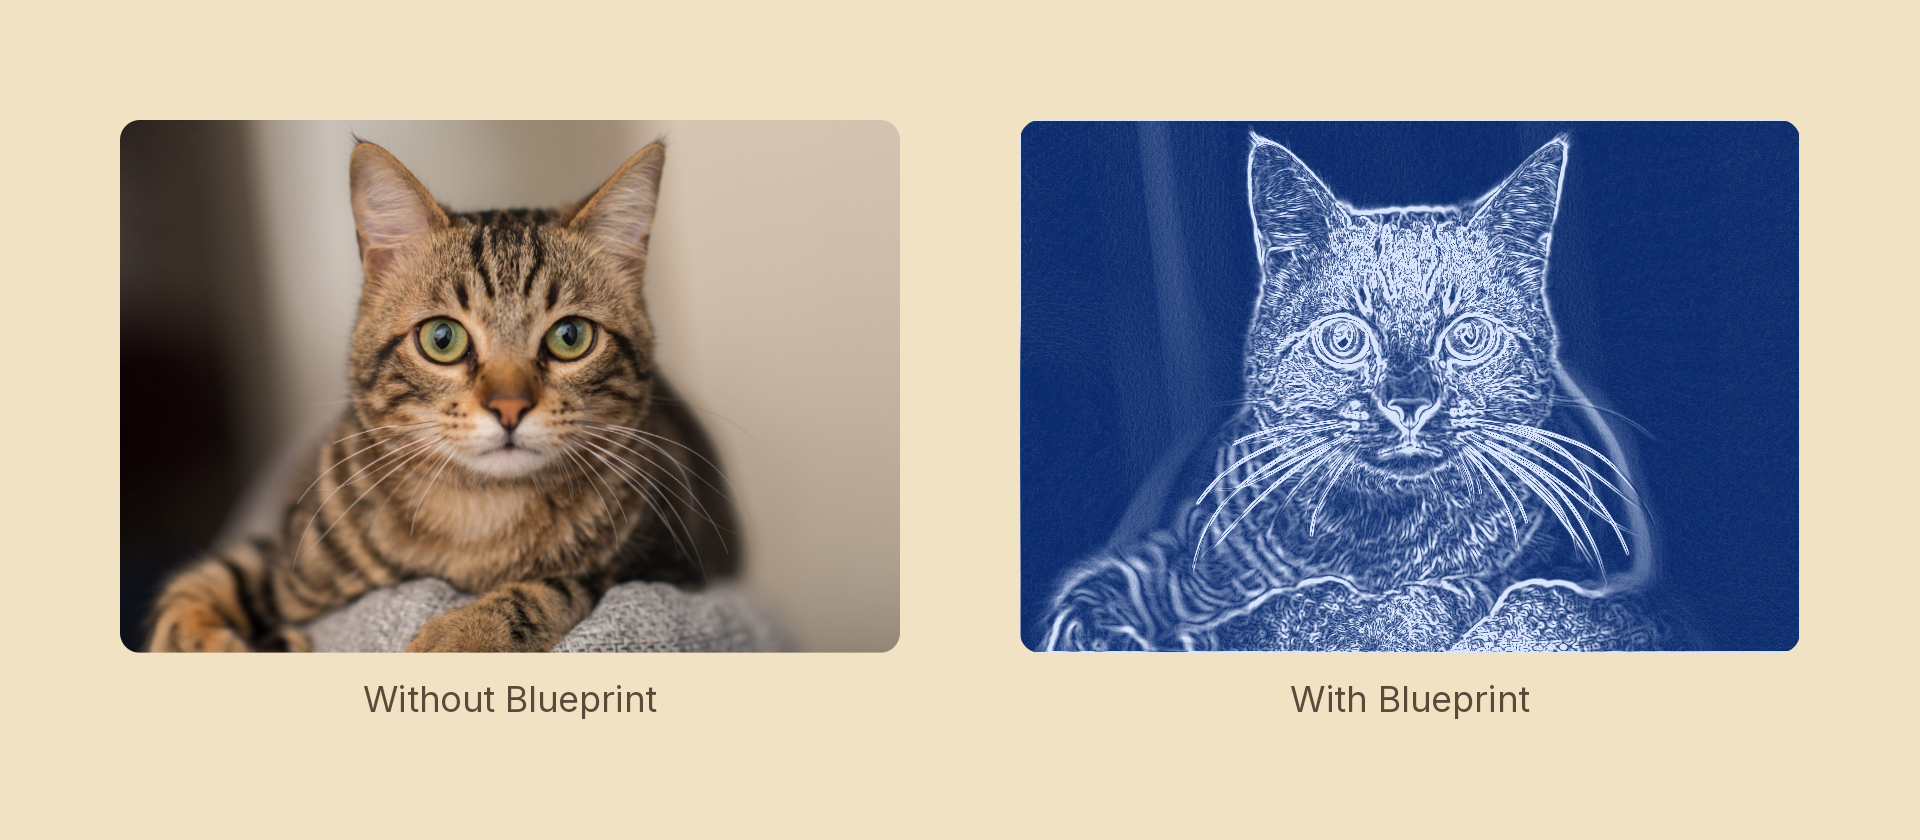
 * Blueprint — pale linework on a drafting ground. `edges` does the work: it
 * already outputs bright lines on black, which is a blueprint inverted. The
 * duotone just recolours those two ends.
 */
export const blueprint = (amount = 1, color: Color = '#0a2a6b'): EffectChain => {
  const a = clamp(amount);
  return Effects
    .edges({ strength: at(a, 0, 2.2), kernel: 'sobel' })
    .grain({ amount: at(a, 0, 0.08), size: 1 })
    .duotone({ amount: a, shadows: color, highlights: '#dbe7ff' });
};

/** Pencil sketch — graphite linework on paper. */
export const pencilSketch = (
  amount = 1,
  graphite: Color = '#2e2c29',
  paper: Color = '#f2ede1',
): EffectChain => {
  const a = clamp(amount);
  return Effects
    .edges({ strength: at(a, 0, 2.4), kernel: 'sobel' })
    .grain({ amount: at(a, 0, 0.1), size: 1 })
    .duotone({ amount: a, shadows: paper, highlights: graphite });
};

/**
 * Chalk — the same edge map as `pencilSketch` with the duotone the other way
 * up, plus heavier grain for the dusty break-up.
 */
export const chalk = (amount = 1, board: Color = '#1f2a26'): EffectChain => {
  const a = clamp(amount);
  return Effects
    .edges({ strength: at(a, 0, 2.2), kernel: 'sobel' })
    .grain({ amount: at(a, 0, 0.28), size: 2 })
    .duotone({ amount: a, shadows: board, highlights: '#eae6d9' });
};

/** Oil painting — Kuwahara brushwork, with the palette pushed a little. */
export const oilPainting = (amount = 1, radius = 4): EffectChain => {
  const a = clamp(amount);
  return Effects
    .oilPaint({ radius: at(a, 0, radius) })
    .colorAdjustment({ saturation: at(a, 1, 1.25), contrast: at(a, 1, 1.1) });
};
Light
/**
 * Neon — glowing tubes on near-black. Bloom must land between the two: run
 * before the edge pass it would have nothing thin to glow, and after the duotone
 * it would bleed the background colour rather than the tube's.
 */
export const neon = (amount = 1, color: Color = '#3df5ff'): EffectChain => {
  const a = clamp(amount);
  return Effects
    .edges({ strength: at(a, 0, 2.6), kernel: 'sobel' })
    .bloom({ intensity: at(a, 0, 1.6), threshold: 0.35, radius: 14 })
    .duotone({ amount: a, shadows: '#05060c', highlights: color });
};

/** Anamorphic glare — the horizontal flare a wide lens throws off a highlight. */
export const anamorphicGlare = (amount = 1, angle = 0): EffectChain => {
  const a = clamp(amount);
  return Effects
    .streak({ intensity: at(a, 0, 2.2), threshold: 0.6, length: at(a, 0, 260), angle })
    .bloom({ intensity: at(a, 0, 0.5), threshold: 0.75, radius: 16 });
};
The amount contract
0 is a no-op and 1 is the full look, with a smooth ramp between — so a recipe animates on like any other effect:
import { createScene, createRef, Image, easeInOut } from 'motion-script';
import { crt } from './recipes';

export default createScene(function* (stage) {
  const photo = createRef<Image>();
  stage.add(<Image ref={photo} src={'./photo.jpg'} effects={crt(0)} />);

  yield* photo().to({ effects: crt(1) }, 1.2, easeInOut('quad'));
});
Two consequences worth knowing when you write your own:
- Every ingredient needs a neutral setting to ramp from.
thresholdhas none — at anysmoothnessit still flattens colour to two tones — which is whyphotocopyreaches forgrayscale+posterizeinstead.asciiandskslare the same. When a look seems to want an ingredient that can't be turned off, that's the signal to find a different ingredient. - Discrete choices don't ramp. A palette or a dot shape is fixed by the recipe and switched on by whatever scalar ingredient carries it:
gameboyholdsbitCrush's palette constant and fades itsamount.
A recipe also keeps a constant chain shape across amounts — same effects, same order, only the numbers move. Interpolation pairs two chains up by index, so a recipe that changed length with amount would pop mid-tween.
Order is the recipe
The sequence inside a recipe is most of what makes it work, and it follows real-world causality:
- Damage before separation.
vhstears the tape (blockDisplace) before the colour split (rgbShift), so the torn bands carry their own fringe. Reversed, you get an intact fringe painted over an already-broken image. - Screen artefacts last. Scanlines and grain go at the end, because a display adds them to whatever it is showing.
- Geometry first.
crtbulges before it draws scanlines, so the lines sit flat on the glass rather than being warped with the picture. - Screen before you ink.
risohalftones then duotones: the screen reduces the image to dots and the duotone maps those dots to ink and paper.
Effect chains run in author order — among effects of the same kind. Filter-surface effects (duotone, grayscale, bloom, colorAdjustment, vintage) currently run after every shader-surface one whatever the chain says, which is why each recipe above lists its shader ingredients first and its filters second: written that way, the source order is the execution order.
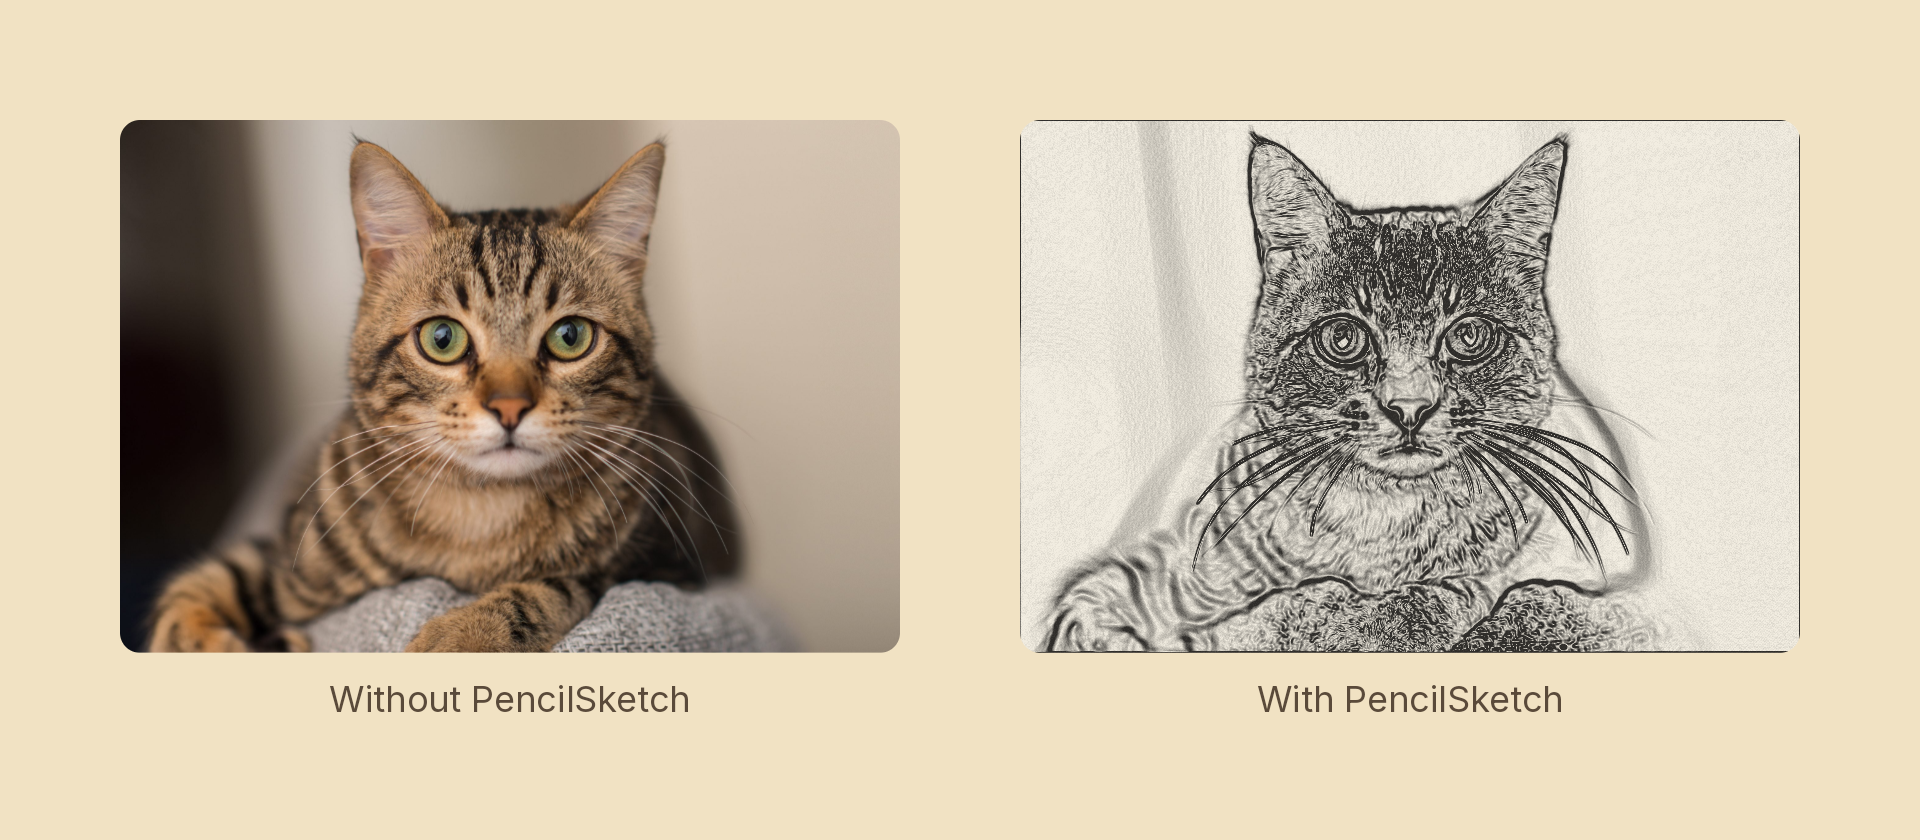
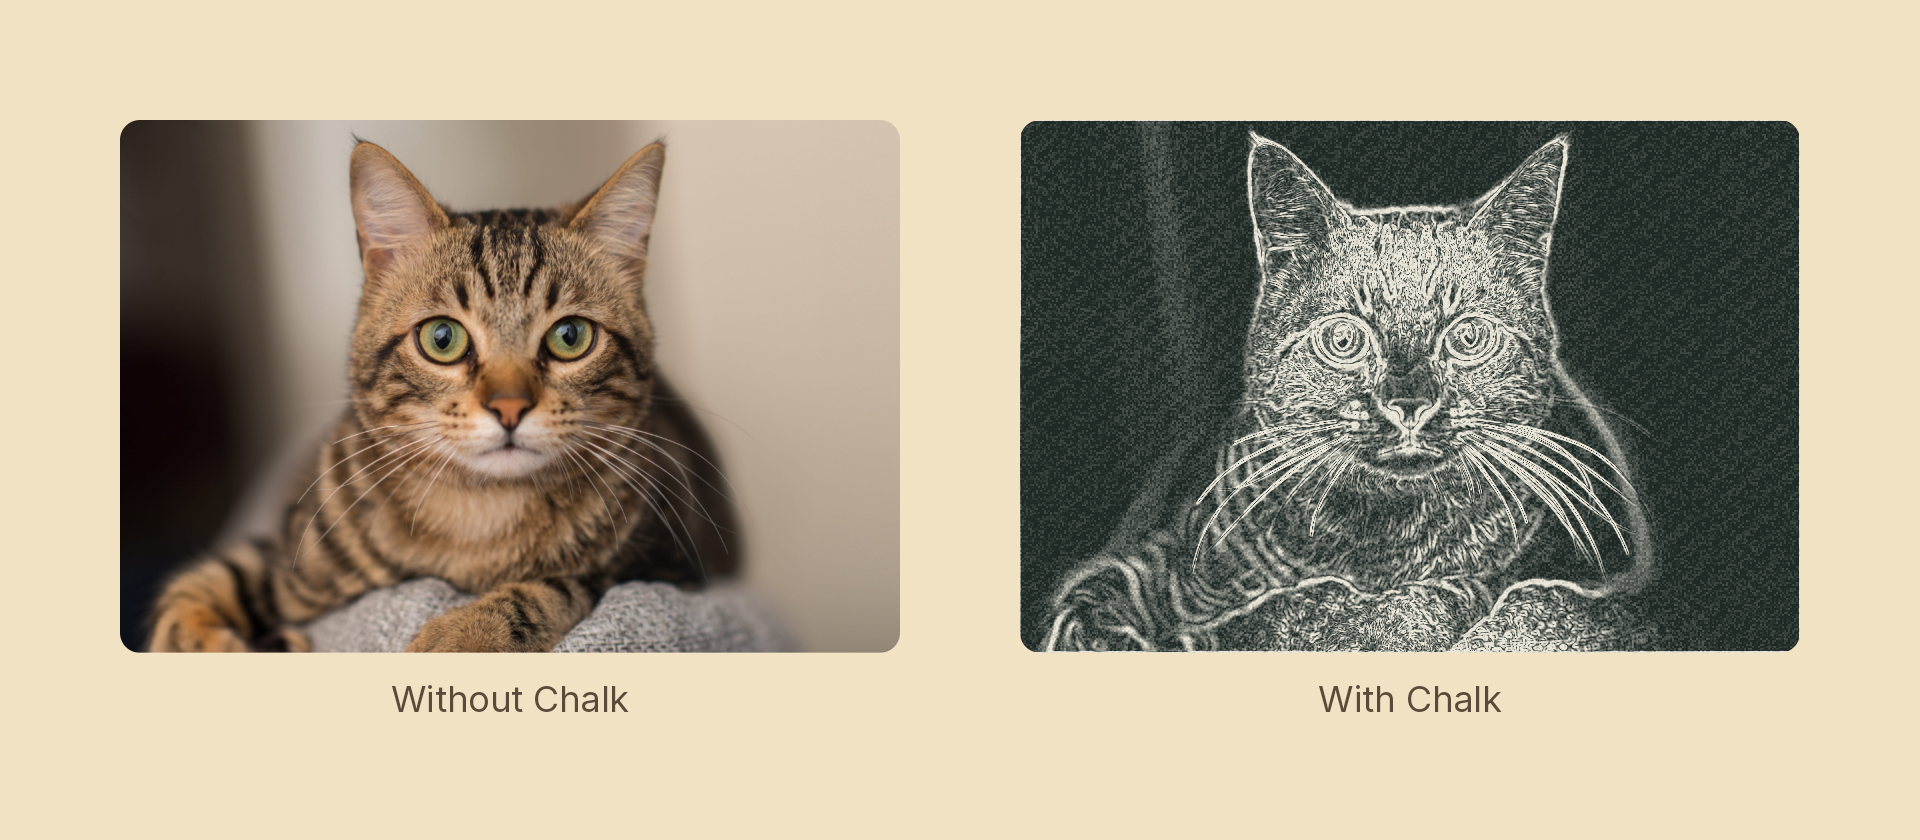
pencilSketch and chalk are the clearest illustration of composing over implementing: identical ingredient lists, with the duotone the other way up.
Rolling your own
There is nothing special about the recipes above — hold to the amount contract and yours will animate the same way:
// Shaders first, then filters — so the source order is the execution order.
export const sepiaPress = (amount = 1): EffectChain => {
  const a = clamp(amount);
  return Effects
    .posterize({ levels: at(a, 255, 5) })
    .grain({ amount: at(a, 0, 0.15), size: 1 })
    .grayscale(a)
    .duotone({ amount: a, shadows: '#2a211a', highlights: '#efe3cc' });
};